Back-end 서버를 개발함에 있어, 보통은 client 의 요청(request)을 받아 특정 로직을 수행하고 그 결과를 보내(response)주지만, 시스템의 규모가 커질수록 서버 간 통신이 불가피하게 됩니다. 특히 시스템 초기에는 불필요햇으나, 서비스의 규모가 커지면서 시스템간 통신이 필요한 경우, 혹은 인증 시스템 등 공통 서비스가 생겨나면서 서버간 통신이 필요하게 됩니다. 여기서는 서버 간 통신을 위해 간단히 http request를 어떻게 구현하는지 살펴보겠습니다.
편의상 Springboot 를 이용하여 요청과 응답을 모두 받을 것입니다. 내가 나 자신에게 요청을 보내는 것이지만, 두 개의 시스템이라면 서버 주소 등을 수정하여 적용 가능합니다.
Download Sample code from GitHub
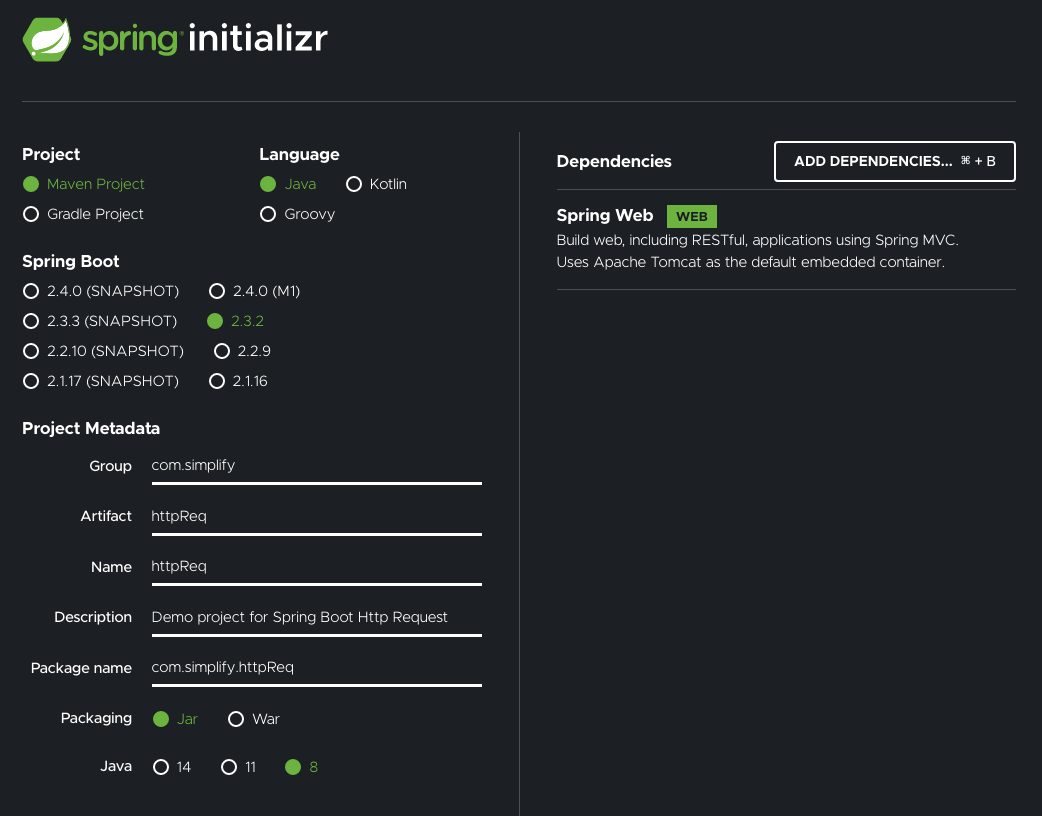
이 글에 사용된 프로젝트는 다음과 같습니다. 간혹 버전이 상이하여 다르게 동작한다는 분들이 있어, 아래 내용도 공유합니다.

pom.xml 수정하기
앞서 생성한 프로젝트에, 라이브러리를 추가합니다.
		<dependency>
			<groupId>org.apache.httpcomponents</groupId>
			<artifactId>httpclient</artifactId>
			<version>4.5.12</version>
		</dependency>
버전은 이 글을 작성하는 시점에서 최신버전이지만, 본인 프로젝트에 맞게 수정/적용하여야 합니다.
수신 서버 먼저 생성하기
우선 보내온 요청에 대해서 응답을 주는 쪽 먼저 개발을 진행하려고 합니다. 위에서 생성한 Springboot 프로젝트에 Controller 를 하나 생성하고 아래와 같이 작성하여 간단한 예제를 작성할 수 있습니다.
아무런 기타 설정을 하지 않았기 때문에 port는 8080 을 사용합니다.
form 요청에 대한 controller 생성
form 요청에 대한 controller는 다음과 같이 설정합니다. produce
@Controller
public class ResponseController {

    @RequestMapping(value="/testForForm", method = RequestMethod.POST)
    public @ResponseBody Map<String, String> testForForm(@RequestParam Map<String, String> reqParam){

        for(Map.Entry<String, String> entry : reqParam.entrySet()){
            entry.setValue(entry.getValue() + "_testForForm");
        }

        return reqParam;
    }

    @RequestMapping(value="/testForJson", method = RequestMethod.POST, produces = {MediaType.APPLICATION_JSON_VALUE})
    public @ResponseBody Map<String, Object> testForJson(@RequestBody Map<String, Object> reqParam){

        for(Map.Entry<String, Object> entry : reqParam.entrySet()){
            entry.setValue(entry.getValue() + "_testForJson");
        }

        return reqParam;
    }
}
두 개의 API를 생성하였습니다. 하나는 /testForForm 이라는 이름으로 Form 형태의 request를 처리하기 위함이고, 다른 하나는 /testForJson 이라는 이름으로 json 형태의 요청에 대한 처리 목적입니다.
내부 로직은 동일하지만, @RequestParam, @RequestBody등으로 차이가 있으니 잘 적용해주어야 합니다.
일반 Form request의 경우에는 별도로 produces 옵션을 주지 않았습니다.
요청 Service 생성하기
이제 이 각가의 controller 에 요청하는 service를 생성하도록 하겠습니다. service 에서는 단순이 각 형태 - Form 또는 json - 에 맞는 Body 를 생성한 뒤 해당 서버에 요청을 보냅니다. (여기서는 localhost)
먼저 Form 형태의 요청에 대한 service입니다.
    public JsonNode requestHttpForm(){

        HttpClient client = HttpClientBuilder.create().build();

        HttpPost httpPost = new HttpPost("http://localhost:8080/testForForm");

        try {

            List<NameValuePair> nameValuePairs = new ArrayList<NameValuePair>(1);

            nameValuePairs.add(new BasicNameValuePair("Email", "youremail"));
            nameValuePairs.add(new BasicNameValuePair("Passwd", "yourpassword"));
            nameValuePairs.add(new BasicNameValuePair("accountType", "GOOGLE"));
            nameValuePairs.add(new BasicNameValuePair("source", "Google-cURL-Example"));
            nameValuePairs.add(new BasicNameValuePair("service", "ac2dm"));

            httpPost.setEntity(new UrlEncodedFormEntity(nameValuePairs));

            HttpResponse response = client.execute(httpPost);

            if (response.getStatusLine().getStatusCode() == 200) {
                ResponseHandler<String> handler = new BasicResponseHandler();
                String body = handler.handleResponse(response);
                System.out.println("[RESPONSE] requestHttpForm() " + body);

                ObjectMapper objectMapper = new ObjectMapper();
                JsonNode node = objectMapper.readTree(body);

                return node;

            } else {
                System.out.println("response is error : " + response.getStatusLine().getStatusCode());
            }
        } catch (IOException e) {
            e.printStackTrace();
        }

        return null;
    }
일반적인 Form 형태의 호출에서는 NameValuePair 객체를 이용해서 POST 요청으로 보낼 파라미터들을 처리합니다.
그리고 전송 후 결과인 HttpResponse 객체에서 Status Code 를 뽑아내서, 200인 경우에는 그 내용을 출력하고, 그렇지 않은 경우에는 모두 다 에러로 간주하였습니다.
이렇게 되면 앞서 생성한 controller 에 요청을 보낸 뒤, controller에서 뒤에 suffix 로 붙여준 _testForForm 이 붙은 body 가 넘어올 것입니다. controller생성 시 @ResponseBody 부분에 Map<String, Object> 를 넣어주었으므로, json 형태로 응답을 보내게 됩니다.
Map<String, Object> 에 대해서 json 형태로 반환하는 것은 springboot 의 기본 기능입니다. 다른 형태로 내보내고 싶다면 message converter 등을 학습하여 변경 처리를 해주어야 합니다.
다음으로는 json 요청에 대한 service부분입니다.
    public JsonNode requestHttpJson(){

        HttpClient client = HttpClientBuilder.create().build(); // HttpClient 생성
        HttpPost httpPost = new HttpPost("http://localhost:8080/testForJson"); //POST 메소드 URL 새성
        try {
            httpPost.setHeader("Accept", "application/json");
            httpPost.setHeader("Connection", "keep-alive");
            httpPost.setHeader("Content-Type", "application/json");

            httpPost.setEntity(new StringEntity("{\"Email\":\"youremail\",\"Passwd\":\"yourpassword\",\"accountType\":\"GOOGLE\",\"source\":\"Google-cURL-Example\",\"service\":\"ac2dm\"}")); //json 메시지 입력

            HttpResponse response = client.execute(httpPost);

            //Response 출력
            if (response.getStatusLine().getStatusCode() == 200) {
                ResponseHandler<String> handler = new BasicResponseHandler();
                String body = handler.handleResponse(response);
                System.out.println("[RESPONSE] requestHttpJson() " + body);

                ObjectMapper objectMapper = new ObjectMapper();
                JsonNode node = objectMapper.readTree(body);

                return node;
            } else {
                System.out.println("response is error : " + response.getStatusLine().getStatusCode());
            }
        } catch (Exception e){
            e.printStackTrace();
        }

        return null;
    }
앞서 생성한 form 호출과 유사하지만, 여기서는 json 형태의 String 을 이용하여 StringEntity 객체를 이용합니다. 지금은 그냥 고정 형태라 저렇게 적어놓았지만, Map 등으로 파라미터들을 받아서 처리해야 하는 경우에는 ObjectMapper 등의 객체를 이용하여 json 을 String으로 변환해서 사용하면 됩니다.
요청 controller 작성
이제 저 서비스를 이용하여 호출하는 controller를 작성합니다. 단순하게 @Autowired 로 해당 service를 이용하여 호출해주면 됩니다.
@Controller
public class RequestController {

    @Autowired
    RequestService requestService;

    @RequestMapping(value="/req/form")
    public @ResponseBody String reqForm(){
        JsonNode node = requestService.requestHttpForm();
        return node.toPrettyString();
    }

    @RequestMapping(value="/req/json")
    public @ResponseBody String reqJson(){
        JsonNode node = requestService.requestHttpJson();
        return node.toPrettyString();
    }
}
구동 및 확인
이제 프로젝트를 구동시키고 브라우저에 http://localhost:8080/req/json 와 http://localhost:8080/req/form 을 호출해 봅니다.

Leave a comment